
Appearance
User Manual
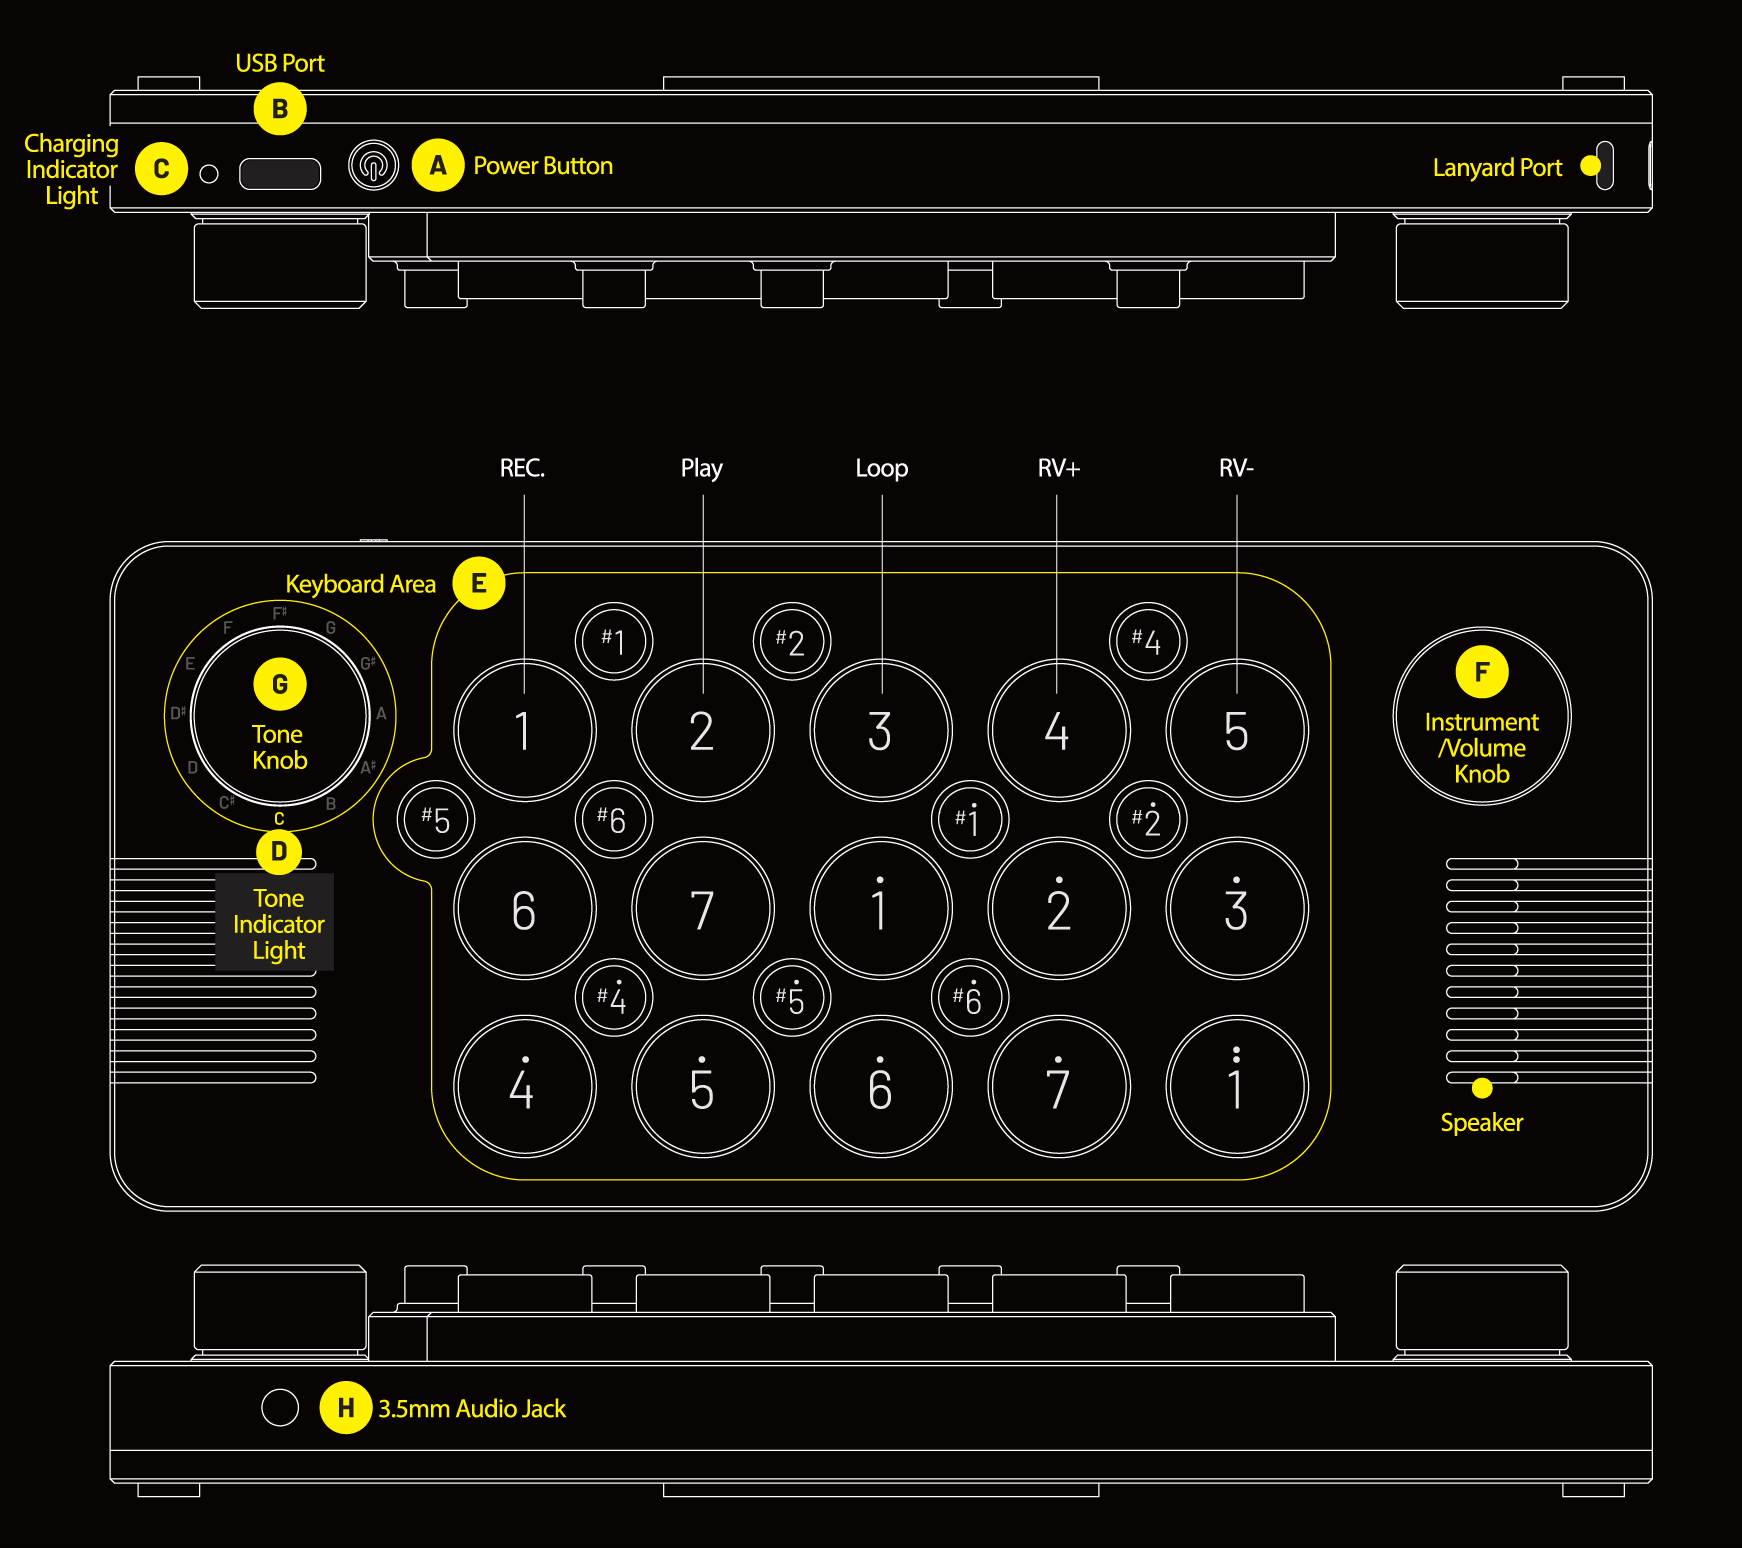
1. Power On/Off & Battery Level
- Power On: To power on, press and hold Power Button A for 2 seconds.
- Power Off: To power off, press and hold the Power Button for 2 seconds. Alternatively, it will automatically power off after 10 minutes of inactivity.
- Charging: Connect the Type-C charging cable to USB Port B on the device to charge. While charging, the Charging Indicator Light C turns red; once fully charged, it turns green.
1.1 Battery Level Display
Upon powering on, Tone/Pitch Indicator Light D will illuminate, displaying the battery percentage. When the battery is low, a reminder ringtone will sound every minute. The device will automatically power off after 5 minutes, so prompt charging is advised.

2. Performance
Press keys in Keyboard Area E to play music.
3. Sounds Change & Volume Change
- Sounds Change: Rotate the Instrument/Volume Knob F counterclockwise to change to the previous instrument, rotate clockwise to change to the next instrument.
- Volume Change: Keep pressing and rotate the Knob counterclockwise to decrease the volume, clockwise to increase the volume.
3.1 Sounds List
| No. | Sound | No. | Sound |
|---|---|---|---|
| 1 | Piano | 14 | Pan Flute |
| 2 | Guitar 1 | 15 | Trumpet |
| 3 | Guitar 2 | 16 | Handspan |
| 4 | Bass | 17 | String Plucking |
| 5 | Vibraphone | 18 | Square Wave |
| 6 | Marimba | 19 | Sawtooth Wave |
| 7 | Glockenspiel | 20 | Electric Guitar (Clean) |
| 8 | Guzheng | 21 | Synth Strings |
| 9 | Accordion | 22 | Synth Voice |
| 10 | Pipe Organ | 23 | New Age (Synth) |
| 11 | Church Organ | 24 | Synth Crystal |
| 12 | Saxophone | 25 | Drum Kit |
| 13 | Piccolo | 26 | MIDI |
Note: This sounds order is for version 1.1. The actual number and order of sounds may change due to version upgrades.
4. Pitch Key Change
- Octave Change: Rotate Tone Adjustment Knob G counterclockwise to lower an octave, clockwise to raise an octave.
- Pitch Key Change: Keep pressing and rotate the knob counterclockwise to lower the tone/pitch, rotate clockwise to raise it.
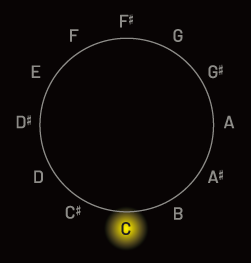
4.1 Pitch Key
The Tone Indicator Light shows the current pitch key.
Additional Notes:
1. The tone octave range of sounds is limited and cannot be infinitely raised or lowered. If there is no response when adjusting the tone, it means the adjustment has reached the limit and cannot be raised or lowered further.
2. The tone range varies for different sounds, with Hang and Drum set having the same range as the keyboard; they cannot be adjusted.
5. MIDI Output
This device can be used as a MIDI keyboard with wired and wireless connection options.
Wired Connection: Connect the keyboard B to your computer using a Type-C cable. In your MIDI-supported software, select the device as "EASYPLAY". Rotate the Instrument/Volume Knob F clockwise until you hear the "MIDI" voice. Now, you can utilize this unit as a MIDI keyboard within your music production software.
Wireless Connection: Launch the wireless MIDI-supporting software and select "EASYPLAY" from the device list to initiate the connection. Rotate the Instrument/Volume Knob F clockwise until you hear the "MIDI" voice. Now, you can utilize this unit as a MIDI keyboard within your music production software.
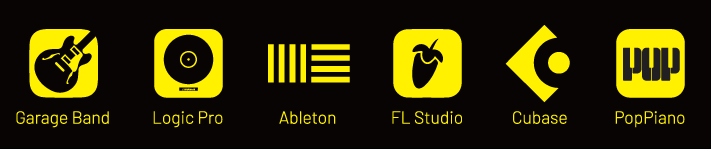
In certain software applications such as GarageBand, users can connect multiple keyboards. This capability allows users to customize each keyboard to play different tunes and perform them simultaneously.
EASYPLAY supports mainstream music production software.
6. Metronome
- Activate & Stop Metronome: Press Tone Knob G and Instrument/Volume Knob F simultaneously to activate the metronome. Currently, the metronome function only supports 4/4-time signature. Press both buttons simultaneously again to deactivate the metronome.
- Change Metronome BPM Rate: While holding down the Tone knob G, rotate the Instrument/Volume Knob F clockwise to increase the current metronome BPM rate, and rotate it counterclockwise to decrease the current metronome BPM rate.
7. Drum Machine
- Activate & Stop Drum Machine: Turn the Instrument/Volume Knob F to 25 (Drum Kit, the last instrument before the MIDI function). Press any semitone button to start the drum machine and press again to stop it. Currently, EASYPLAY has 10 different pre-set rhythm patterns to inspire creativity.
- Change The BPM Rate of the Drum Machine: While holding the Tone Knob G, rotate the Instrument/Volume Knob F clockwise to increase the current BPM rate of the drum machine, and rotate it counterclockwise to decrease the current BPM rate of the drum machine.
8. Record & Replay
8.1 Record
- Press and hold the Tone Knob G and click Key 1 (the first key in the first row in the Keyboard Area E) at the same time.
- Observe the Tone Indicator Light D. The flashing white light indicates that the recording is ready.
- Start playing.
- Press and hold the Tone Knob G again and click Key 1 (the key in the top left corner in the Keyboard Area E) at the same time to end the recording.
8.2 Replay
- Press and hold the Tone Knob G and click Key 2 (the second key in the first row in the Keyboard Area E) to start playing the sound recorded in EASYPLAY.
- Press and hold the Tone Knob G again and click Key 2 to end the playback.
PS: Currently, EASYPLAY only supports recording 1 track to record inspirations. Repeated recording will overwrite the content of the previous recording. If you wish to carry out complex and multi-track creations, please use the MIDI function to connect to DAWs to achieve it.
8.3 Loop
- Press and hold the Tone Knob G and click Key 3 (the third key in the first row in the Keyboard Area E) to loop play the sound recorded in EASYPLAY.
- Press and hold the Tone Knob G again and click Key 3 to end the looping play.
PS: Currently, the Loop function only supports simple loop playback of the recording and does not support adjusting the ending beat. The system will automatically cut the position from the beginning of the first note to the end of the last note. It is used for simple inspiration recording. If you need to carry out complex loop clipping, please use the MIDI function to connect to DAWs to achieve it.
8.4 Change the Volume of the Recording
- Press and hold the Tone Knob G and click Key 4 (the fourth key in the first row in the Keyboard Area E) to increase the volume of the recording file.
- Press and hold the Tone Knob G and click Key 5 (the fifth key in the first row in the Keyboard Area E) to reduce the volume of the recording file, to match the scenario of playing while playing back.
8.5 Change the Replay & Loop BPM Rate
While holding the Tone Knob G, rotate the Instrument/Volume Knob F clockwise to increase the current recording BPM rate, and rotate it counterclockwise to decrease the current recording BPM rate.
9. Wireless Speaker
This device can also serve as a wireless speaker. Simply keep it powered on, then search for and connect to the device named "EASYPLAY MUSIC" from your phone or computer. Once connected, you can effortlessly stream music through the device. Additionally, you can play along with any music being played.
10. Connecting to Headphones, Speakers, or Internal Audio Recording
If you need to connect external speaker devices or use internal recording, you can connect the external speaker or sound card to the 3.5mm Audio Jack H on this device. Hold down and rotate the right knob to adjust the audio output level.
11. Replacing Keycaps
The Large Keycaps E on the music keyboard can be easily replaced. Simply grab the keycap gently and pull it straight up to remove it. Align the new keycap with the square hole and insert to complete the replacement. We will continuously introduce more styles to provide you with a wider selection, so stay tuned!
12. Technical Specifications
- Name: Pocket Music Keyboard
- Model: EASYPLAY 1S
- Size: 174mm x 76mm x 28mm
- Version: 1.1
- Battery Capacity: 1500mAh
- Working Voltage: 3.7V
- Batch Number: Refer to outer packaging
13. Common Troubleshoot
| Issue | Possible Cause | Fix |
|---|---|---|
| Unable to power on | Low battery | Connect to USB port for charging |
| The audio has unwanted noise | Low battery or Volume too high | Connect the USB port for charging or reduce the volume appropriately |
| No sound when playing | Instrument is in MIDI mode | Rotate the right knob counterclockwise to exit MIDI mode |
| Unable to charge | Environment temperature is too high or low | Please charge in an environment with a temperature between 41°F and 95°F (5°C-35°C) |
Additional Notes:
- Keep the product panel dry to avoid liquid splashing on the panel.
- Please do not disassemble the device by yourself; otherwise, SummerTones reserves the right to refuse to provide free warranty service.
- It is recommended to charge this product in an environment with a temperature between 41°F and 95°F (5°C-35°C).
- The charger power should not exceed 15W, and it is recommended to use a 5V charger.
14. FCC Statement
This device complies with Part 15 of the FCC Rules. Operation is subject to the following two conditions:
- This device may not cause harmful interference, and
- This device must accept any interference received, including interference that may cause undesired operation.
Warning: Changes or modifications not expressly approved by the party responsible for compliance could void the user's authority to operate the equipment.
NOTE: This equipment has been tested and found to comply with the limits for a Class B digital device, pursuant to Part 15 of the FCC Rules. These limits are designed to provide reasonable protection against harmful interference in a residential installation. This equipment generates uses and can radiate radio frequency energy and, if not installed and used in accordance with the instructions, may cause harmful interference to radio communications. However, there is no guarantee that interference will not occur in a particular installation. If this equipment does cause harmful interference to radio or television reception, which can be determined by turning the equipment off and on, the user is encouraged to try to correct the interference by one or more of the following measures: Reorient or relocate the receiving antenna. Increase the separation between the equipment and receiver. Connect the equipment into an outlet on a circuit different from that to which the receiver is connected. Consult the dealer or an experienced radio/TV technician for help.
15. RF Warning Statement
The device has been evaluated to meet general RF exposure requirements. The device can be used in portable exposure conditions without restriction.